Focus Stacking to Increase Effective Depth of Field
Images
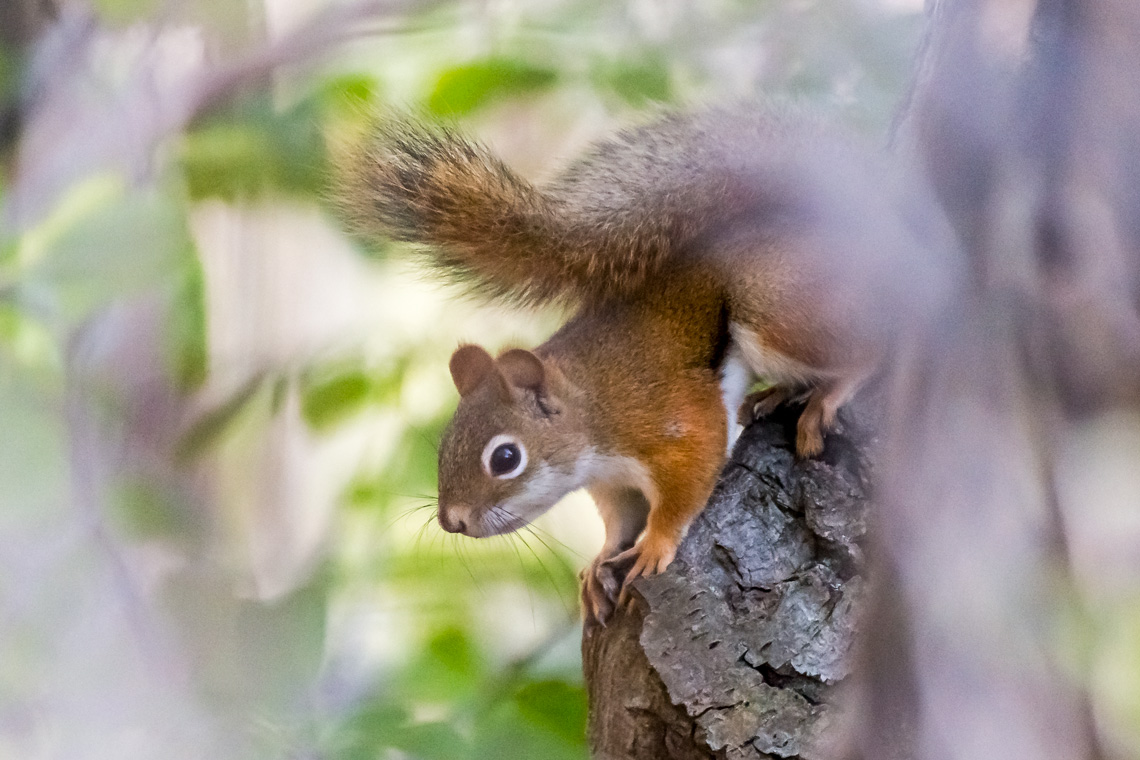
A limitation of classical photographic optics is that only a portion of the depth of a subject is ever in sharp focus. For example, if the foreground is in focus, the background will be blurry, and vice versa. The portion that is in focus is known as the depth of field, and is a function of the focal length of the lens, the lens aperture, and the distance to the main subject. Depth of field can be increased or decreased with different combinations of these variables, but essentially the entire subject area between the camera and infinity is never in focus at one time or in a single exposure. The ability to control depth of field can be an advantage to the photographer in many cases, such as in the picture below where the shallow depth of field draws the viewer’s attention to the squirrel by keeping it in focus while blurring the leaves and branches in the foreground and background.
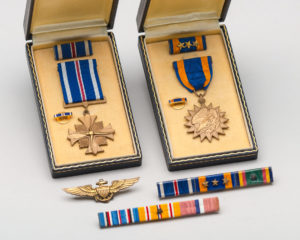
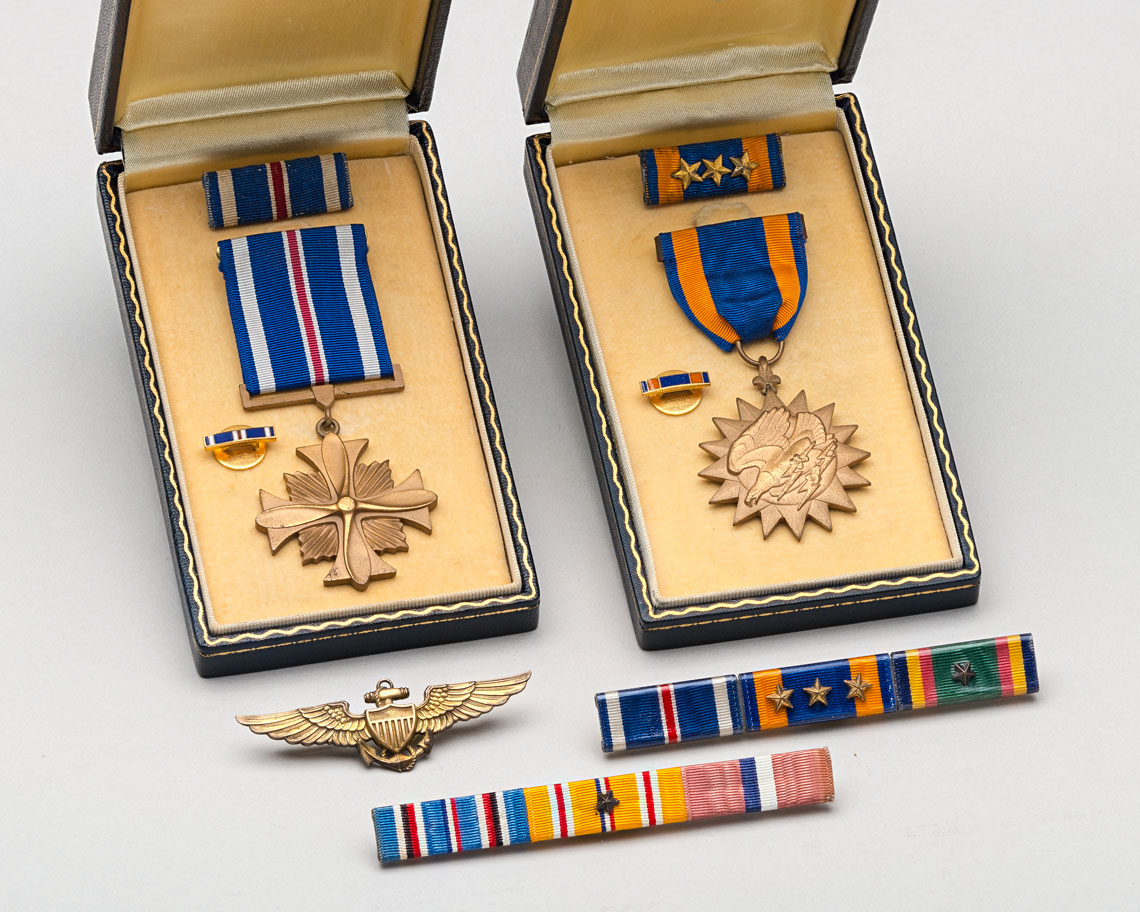
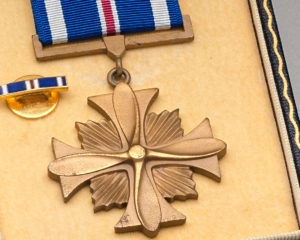
On the other hand, it is often desirable to have the entire content of a scene in sharp focus, such as when recording a World War II veteran’s service decorations like those below. Happily, in those cases where it is desired to maximize depth of field beyond the capability of the lens alone, the advent of digital photography has made it possible to do so almost indefinitely through a process known as focus stacking.
Focus stacking is accomplished by making a series of photographs of a particular subject while varying the focus point from the front to the back of the subject and then using specialized software to assemble the in-focus portions of all of those individual images into a single one that appears to be in focus through the entire distance of points captured.
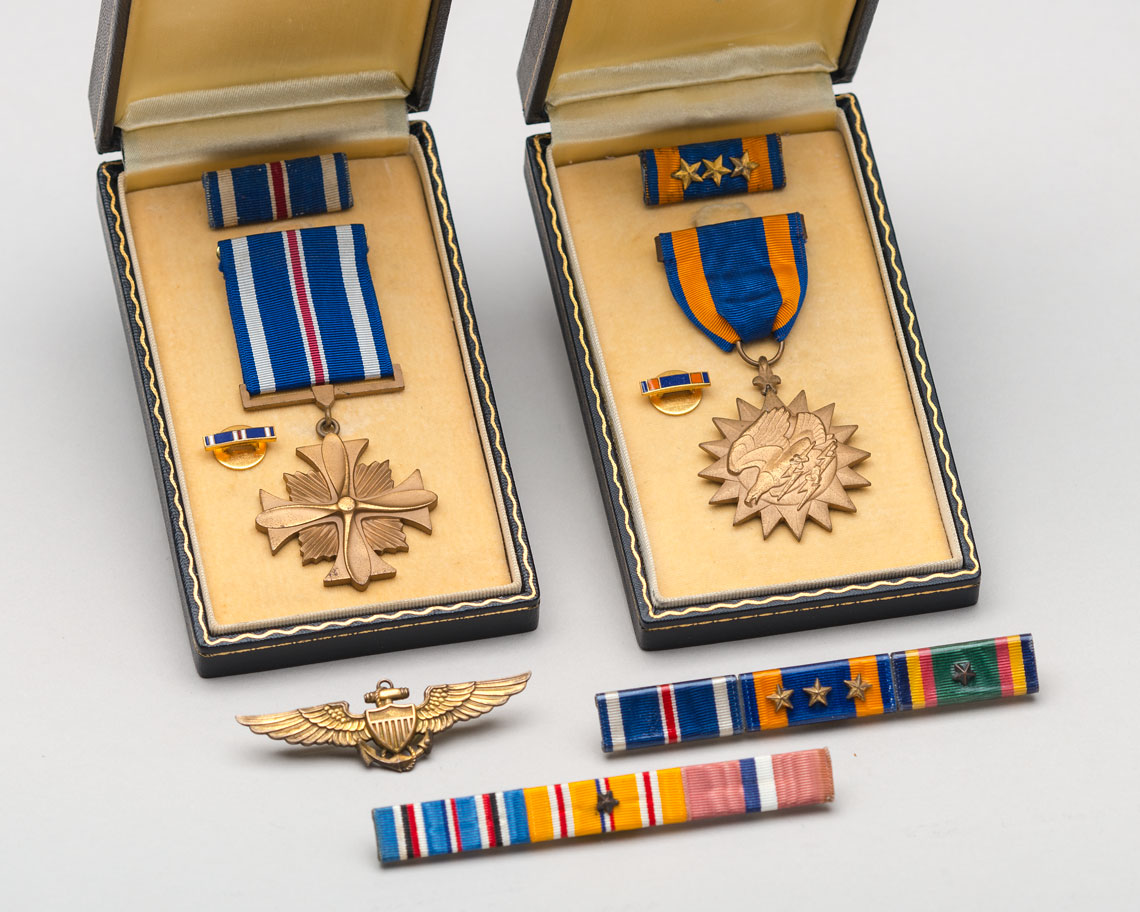
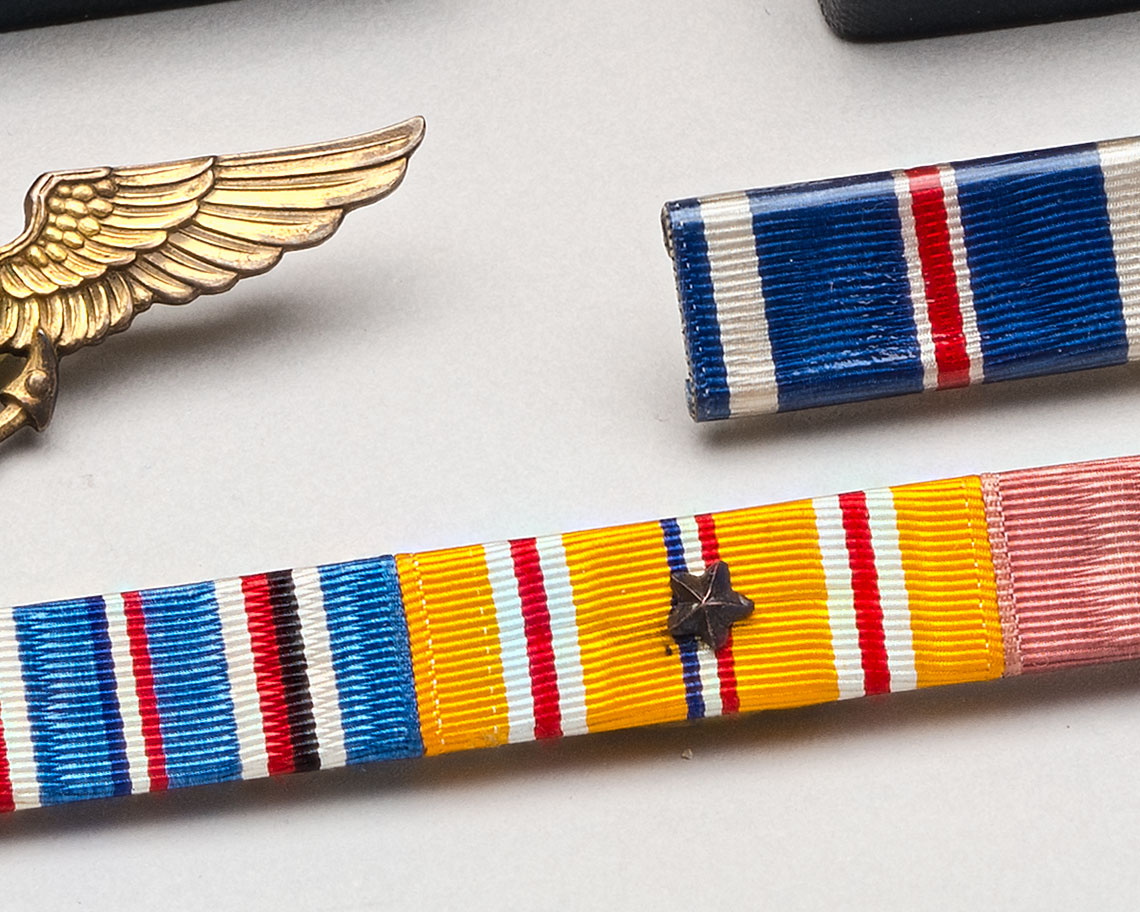
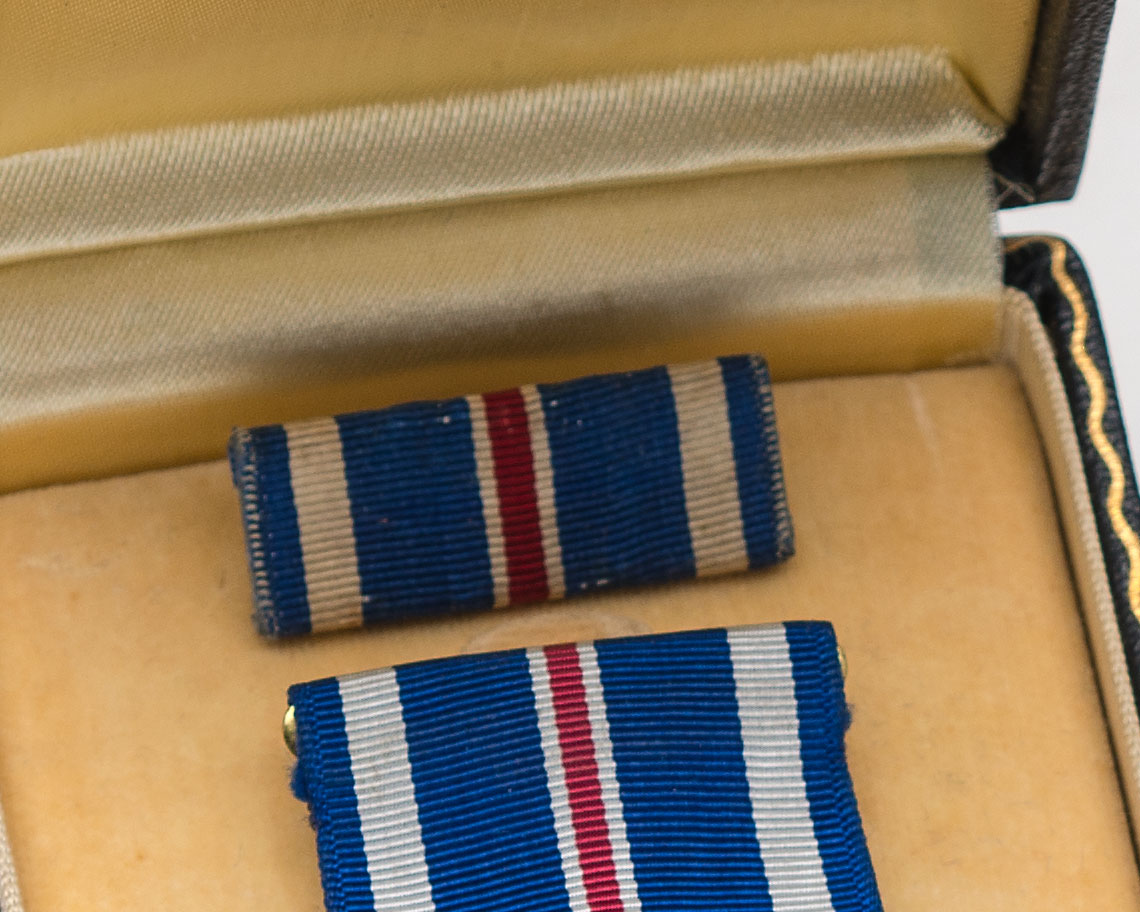
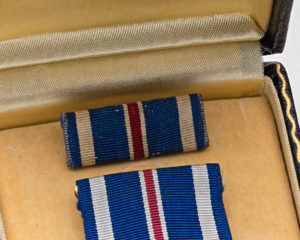
While not as obvious as in the picture of the squirrel above, the image on the left below is a single exposure focused near the center/top of the cross while the ribbons at the top and bottom of the image are consequently slightly out of focus and appear soft. The image on the right was created from a stack of over a dozen images which were sequentially focused starting on the nearest ribbon and proceeding all the way to the back of the case. The differences and similarities in the two main images can be seen more clearly in the closeups immediately below them. Click on an image to enlarge it, then hover over it to see an arrow and click again to see the comparison image.
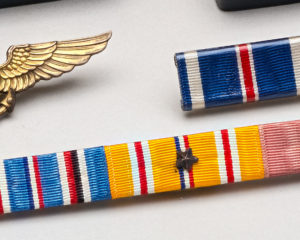
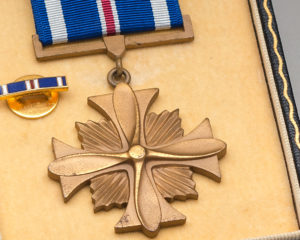
Images of U. S. Naval aviation decorations including campaign ribbons, wings, Distinguished Flying Cross, and Air Medal.
-
- Single Exposure
-

- Stacked Exposures
-

- Single Exposure

-
- Stacked Exposures
-
- Single Exposure

-
- Stacked Exposures

-

- Single Exposure
-
- Stacked Exposures

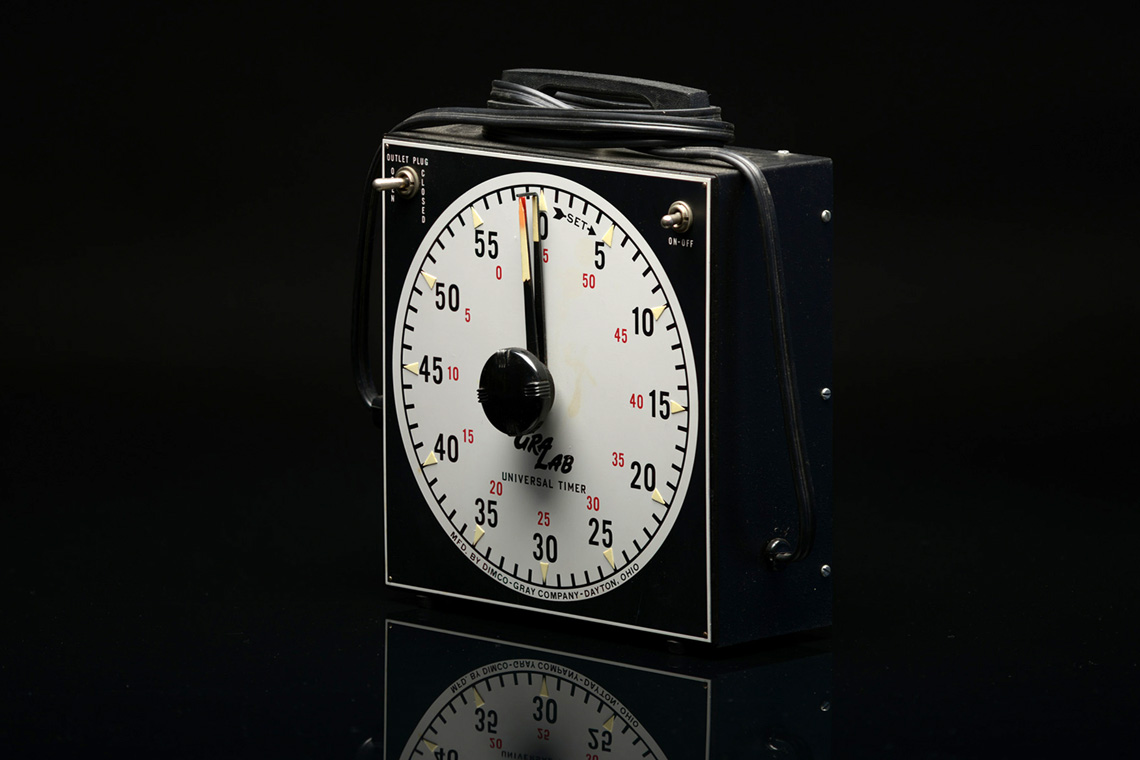
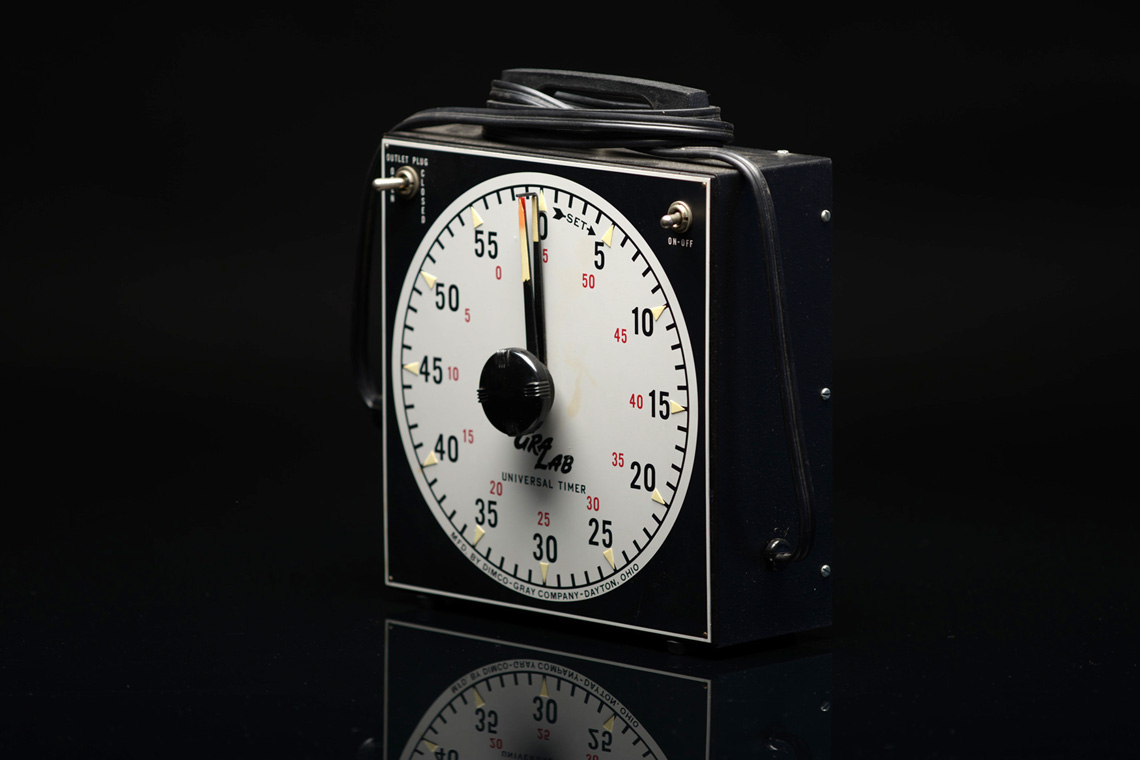
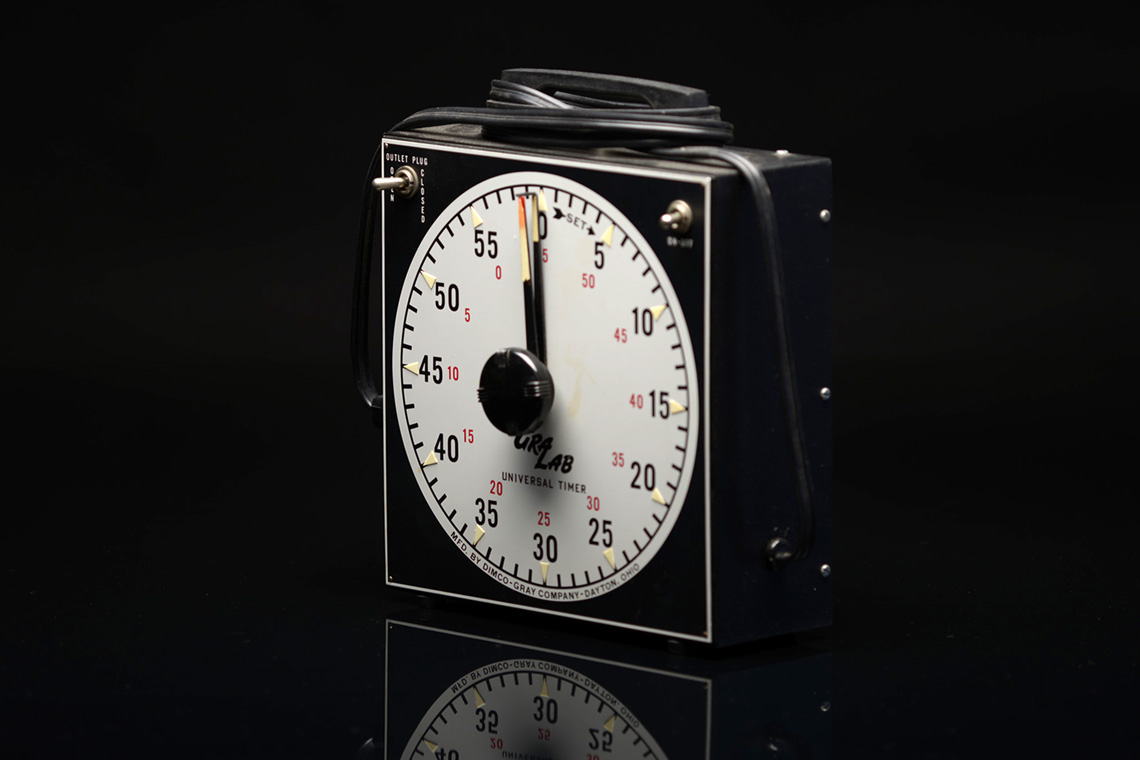
Below is the image of a darkroom timer on the left, followed by two of the partial-focus images from which it was composed. Notice the soft focus at the “45” and then the “15” position in the second and third images. Learn more about depth of field here.
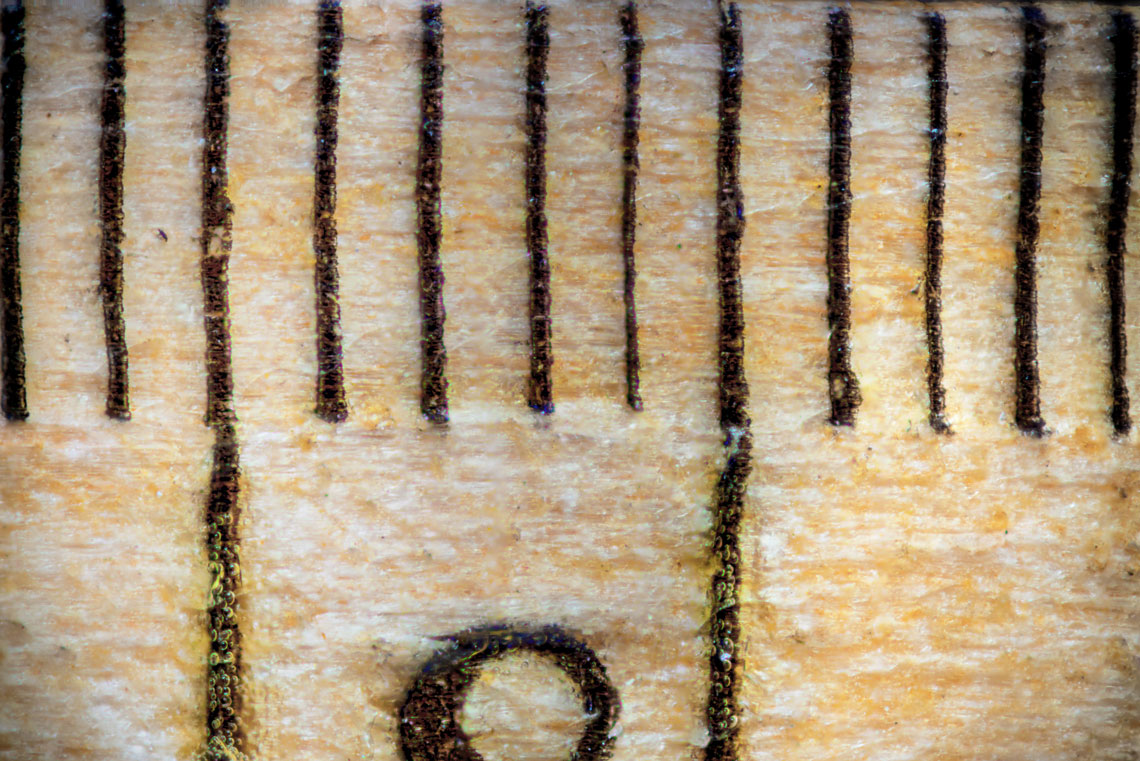
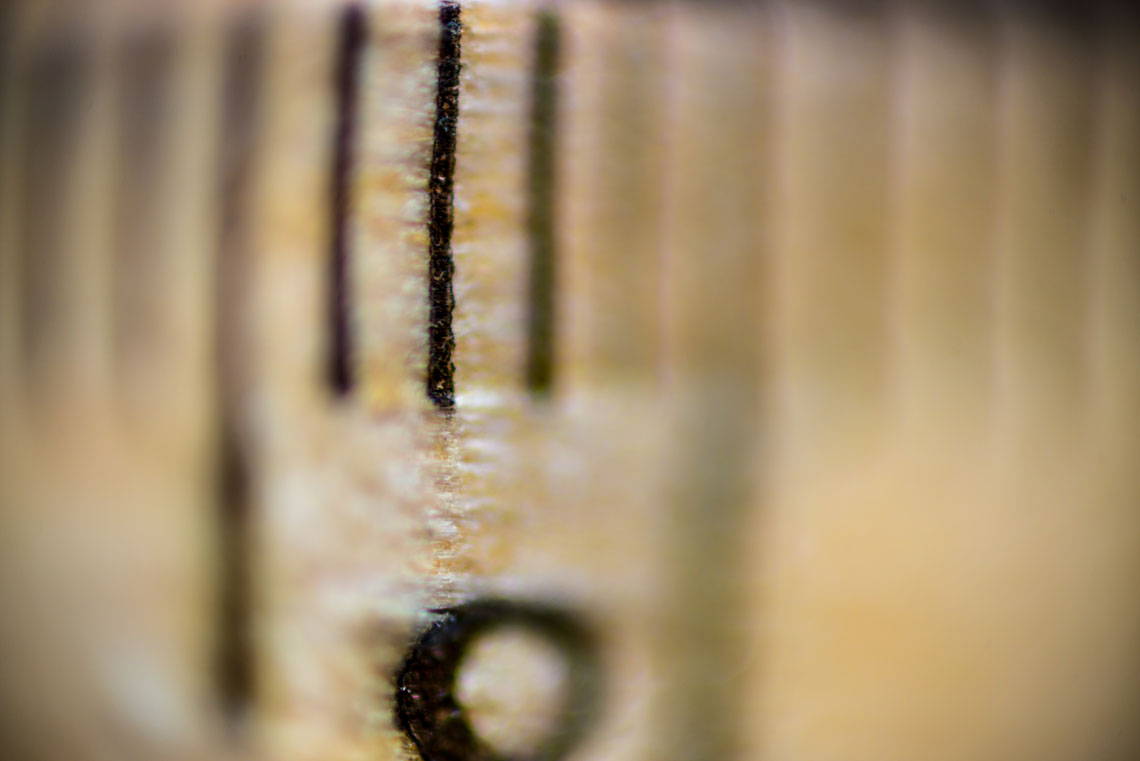
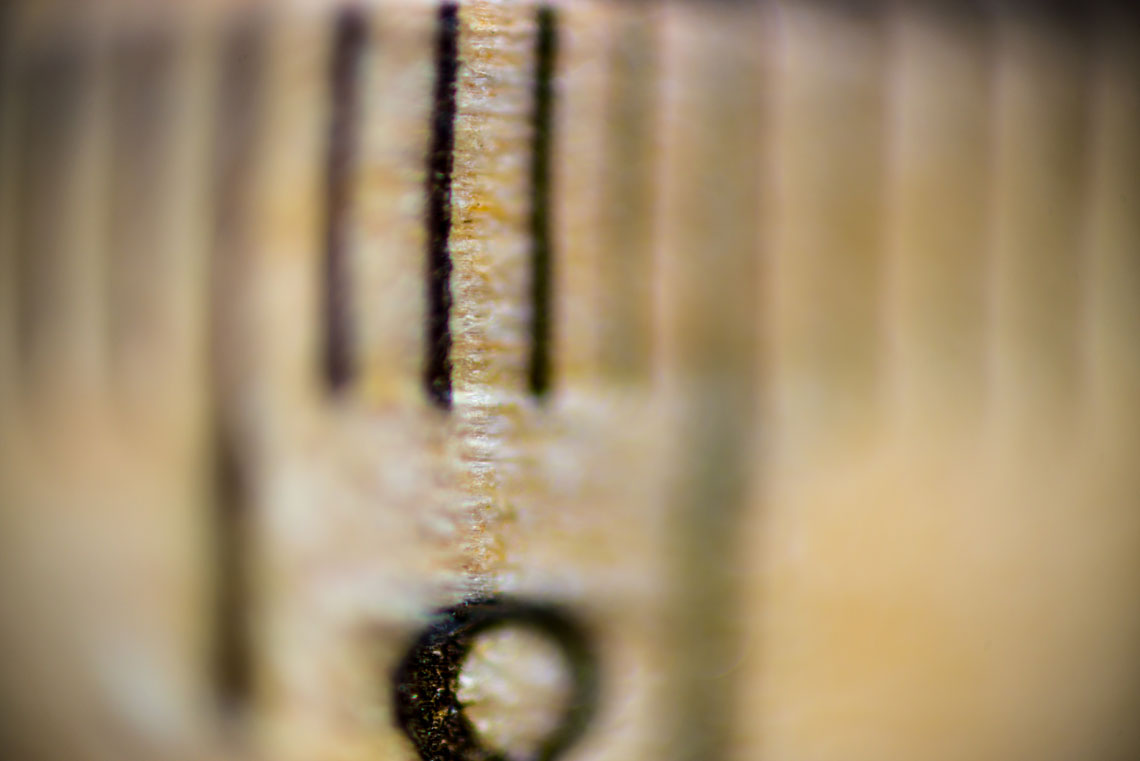
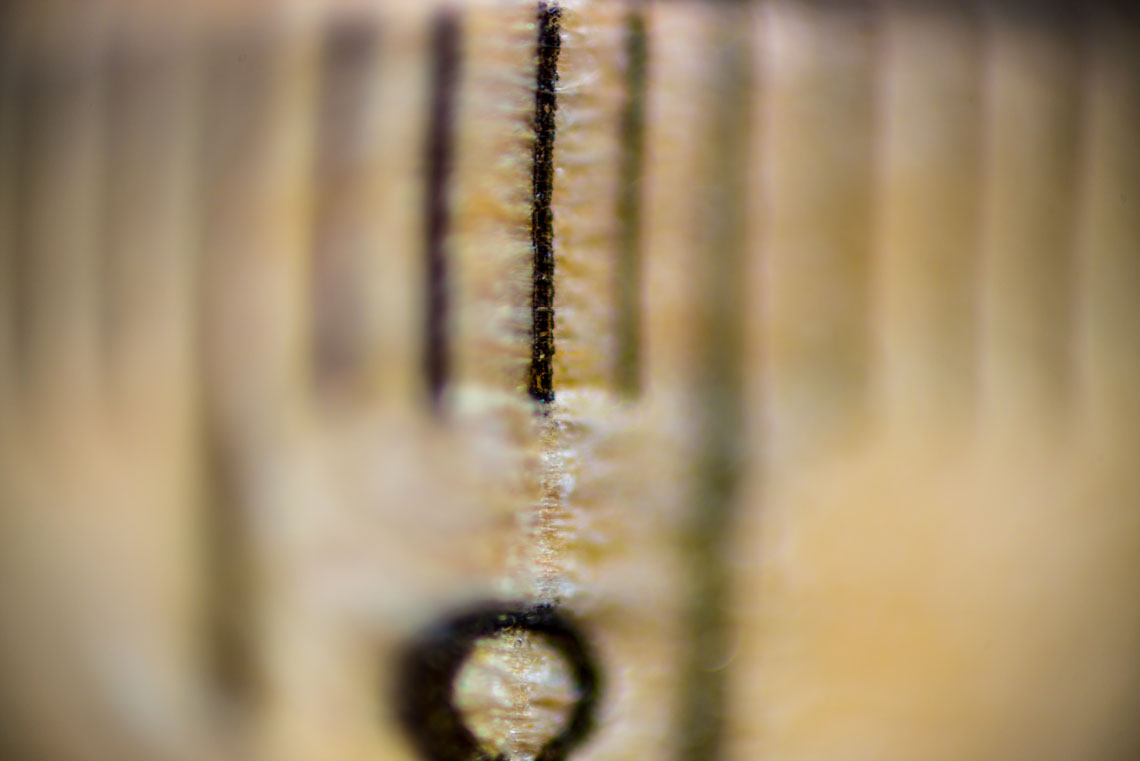
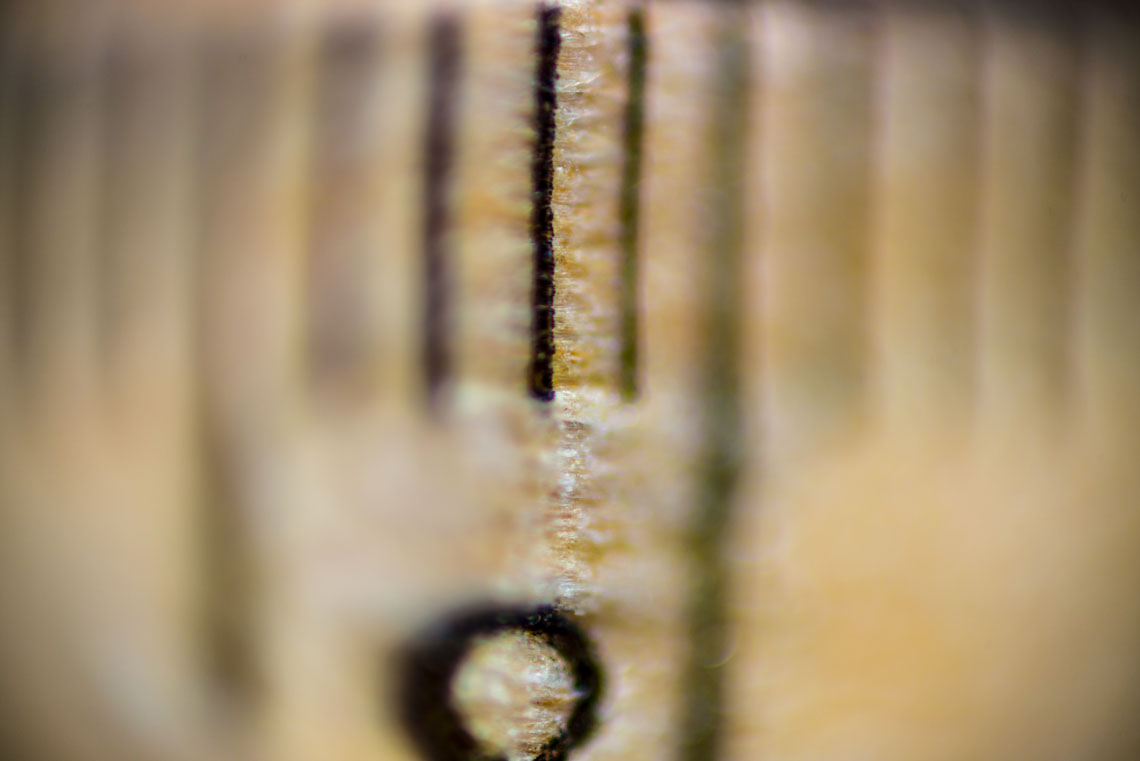
This is an extreme closeup image of a portion of a wooden ruler that was photographed while it was positioned at an angle to the camera. Although it looks quite unremarkable here, the discussion found below should provide the reader with some appreciation of how focus stacking can be used to create a completely focused image from a series of partially focused ones.
Discussion
The following is a demonstration of how focus stacking can be used to compensate for insufficient depth of field.
Setup
This is an image of the ruler about to be photographed. For the purpose of this exercise it is positioned at a 45 degree angle relative to the optical axis of the lens so that the portion of it viewed by the camera can never be completely in focus.
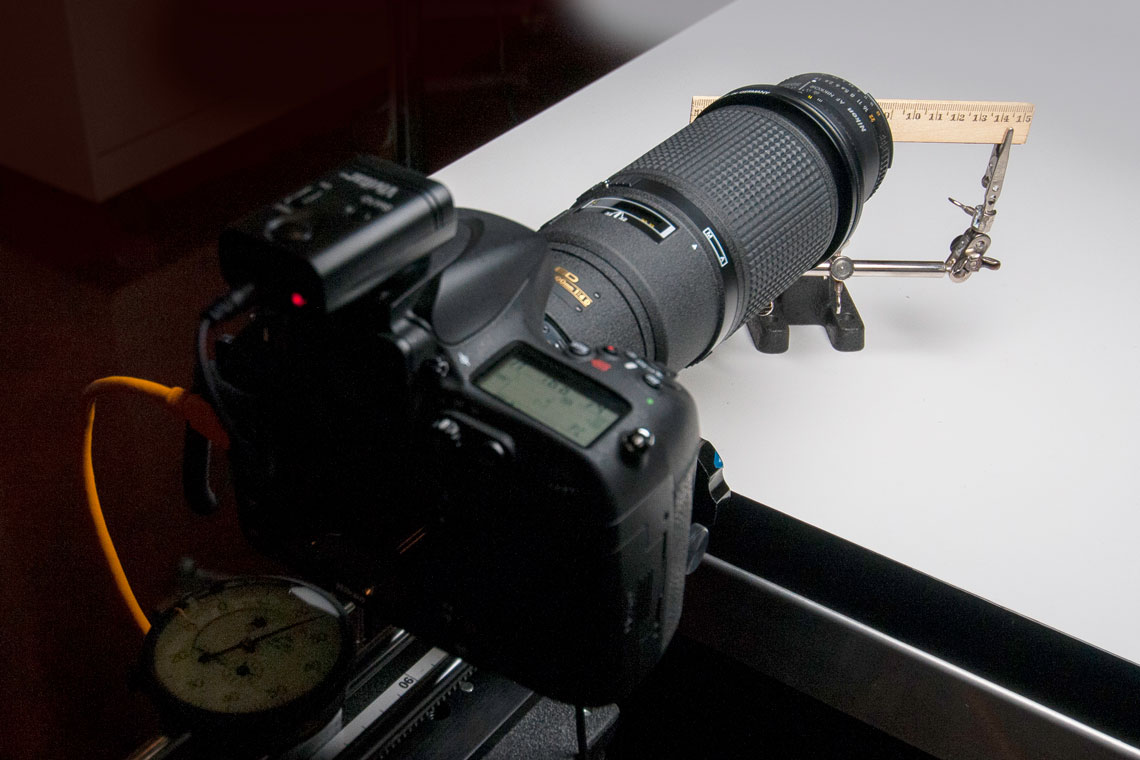
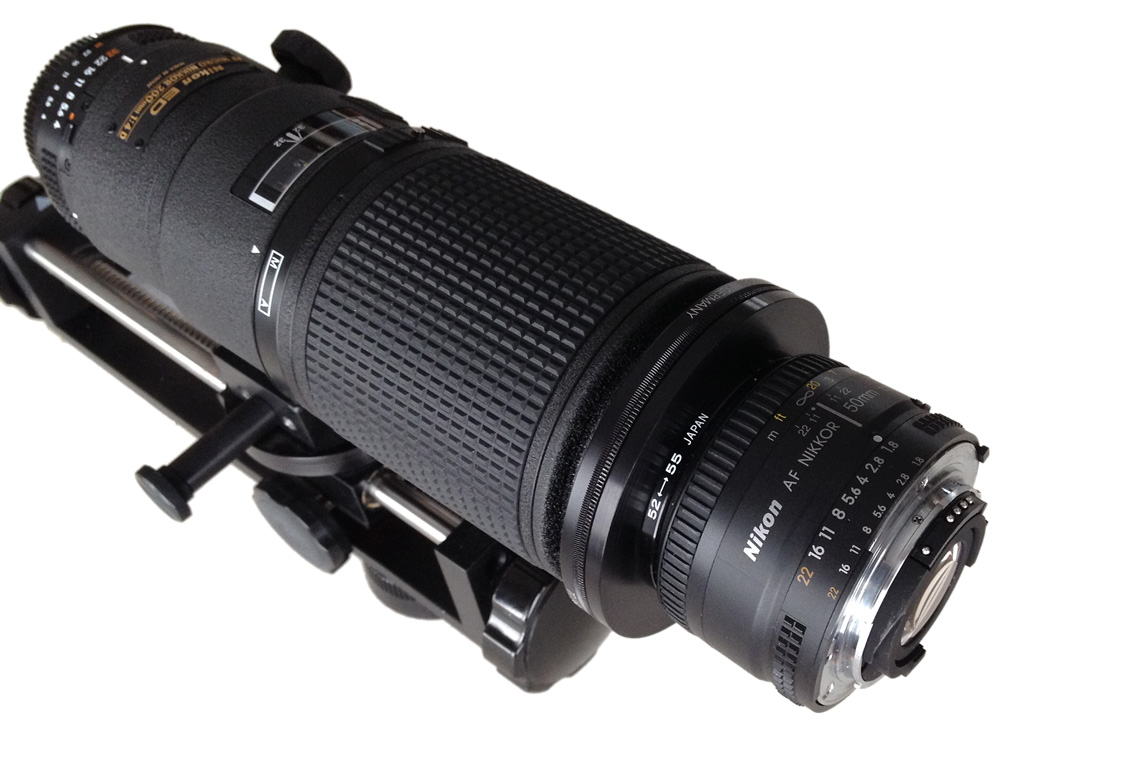
It is a property of conventional lenses that the greater their magnification of the image is, the less depth of field they have, and with a 4:1 magnification in this case, the depth of field is paper thin. To achieve it a 50 mm lens was reversed and attached to the end of a 200 mm macro lens as shown here:
The extremely shallow depth of field of this lens arrangement is illustrated in this image of the ruler taken near the center of the field of view and at mid-distance from the lens. Because the ruler is at an angle to the camera, the left edge of the image is the portion of the ruler that is closest to the camera, while the edge at the right is the furthest away, and no greater area of the ruler can be put in focus, neither near nor far, than the amount shown here:

Procedure
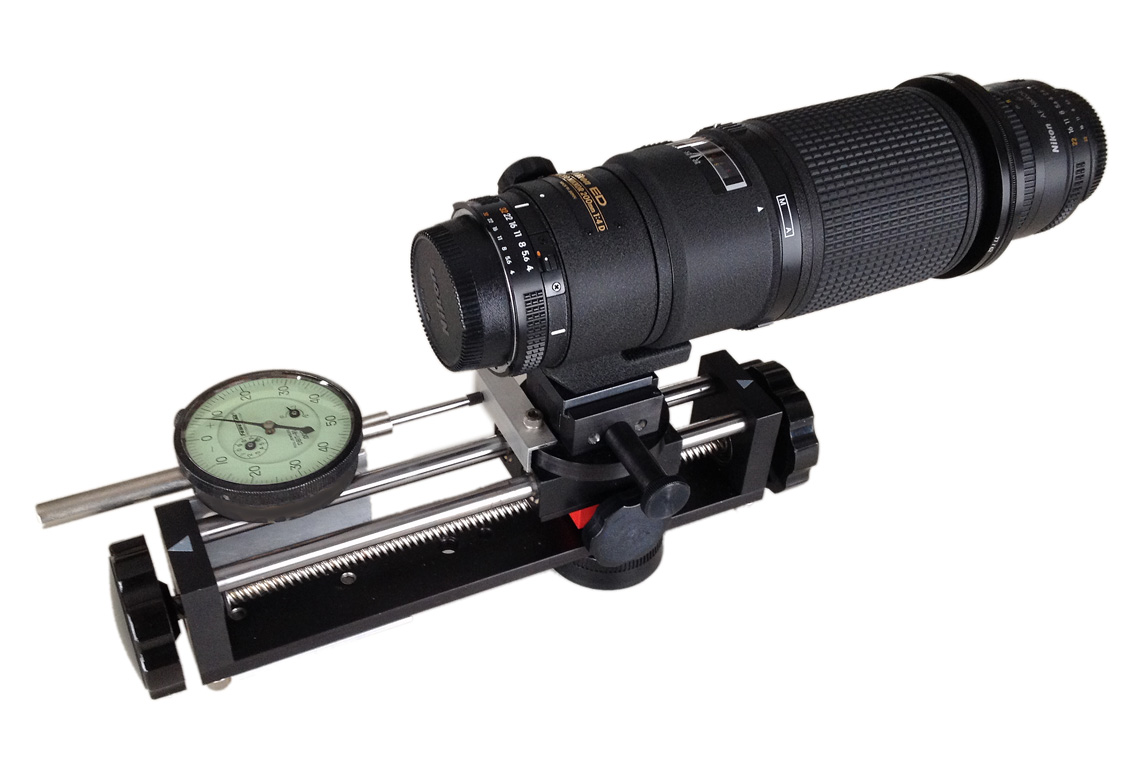
In order to take a series of in-focus pictures that covered the entire field of view from near to far, the camera and lenses were mounted on a manually actuated translation stage which included a dial indicator that could display the distance the camera moved any time the stage’s screw was turned. The indicator was graduated in 0.001 inch increments. This assembly was mounted on a tripod and positioned close enough to focus on the subject. To create the images for the focus stack the camera was moved in 0.005 inch steps starting from a position slightly before the near focus point of the ruler to a point slightly beyond the most distant focus point, with an image being recorded at every step, for a total of 75 images and a total distance of 0.375 inch. The images below show the stage and indicator assembly with the lenses mounted on it, and again while in use with the camera. Also shown is a group photo of all 75 incremental images.

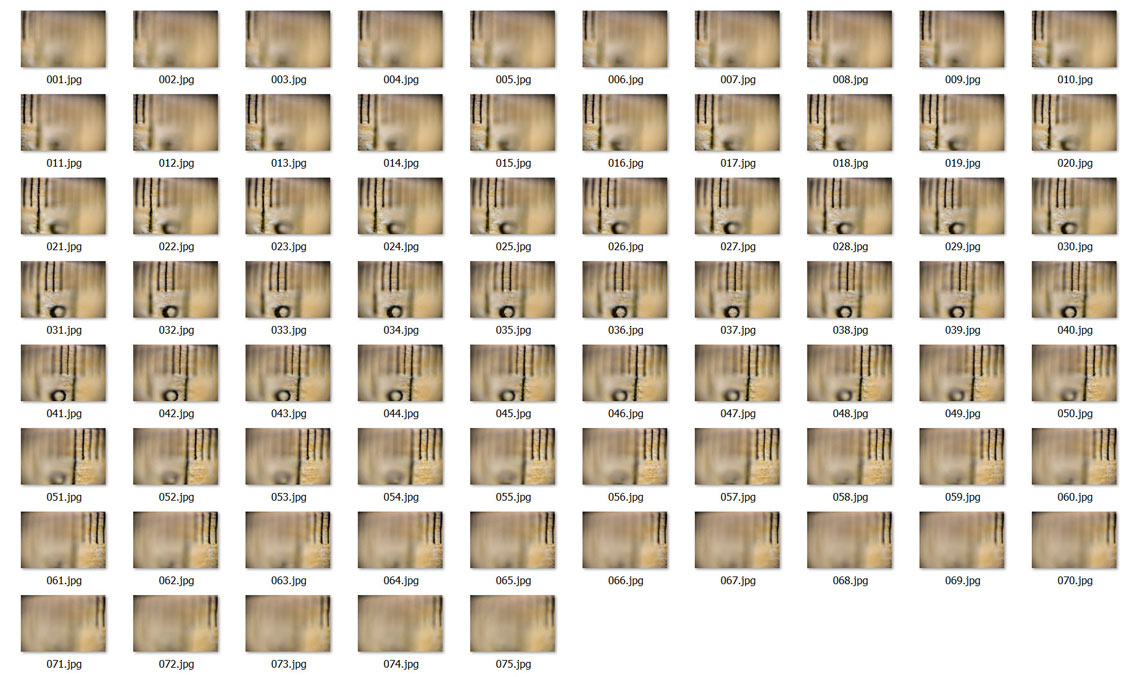
You can click through this gallery consisting of a few of the images above to get an idea of how the focus changed per step:


Processing
The final image was created by processing the 75 incremental ones with Zerene focus stacking software which aligned all of the images and combined the in-focus portions of each one to produce one completely in-focus composite:
Bonus Content
A video made from the 75 still images above.